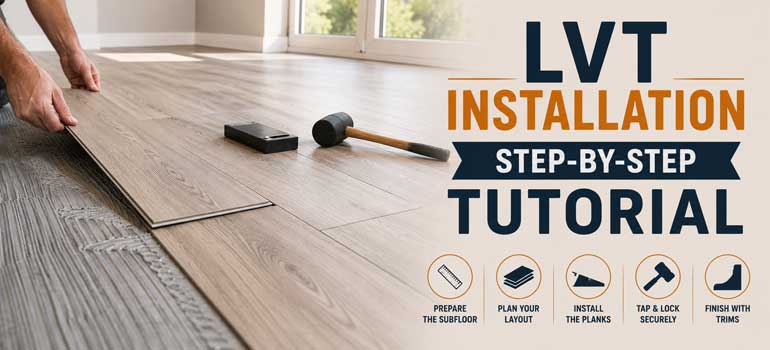
LVT flooring has become one of the most versatile choices for homes and light commercial spaces in the UK, combining the appearance of natural wood or stone with the practicality and water resistance of vinyl. Here's a complete, accurate walkthrough of the installation process, whether you're planning to fit it yourself or want to understand what a professional job actually involves.
Why LVT Works So Well
LVT's water resistance makes it a genuinely strong fit for kitchens, bathrooms, and utility rooms, and its multi-layered construction gives it real resilience under heavy footfall while staying comfortable underfoot. With a wide range of colours, textures, and finishes available, it can convincingly replicate anything from classic oak planks to contemporary concrete effects. Many rigid core products can also be installed directly over existing flooring, which can genuinely save time on subfloor preparation compared with other flooring types.
Tools And Materials You'll Need
- Luxury vinyl tiles, always ordering roughly 10% extra to cover wastage.
- Adhesive, if using a glue-down product.
- A utility knife, ruler or straight edge, and measuring tape.
- A rubber mallet, and an LVT roller for glue-down applications.
- Spacers, if fitting a click-lock system.
- A chalk line or spirit level for accurate layout.
- Subfloor levelling compound, if the subfloor needs correcting.
Protective gloves and knee pads are worth wearing throughout, this is genuinely hands-and-knees work for most of the process.
Step 1: Prepare The Subfloor
The subfloor needs to be clean, dry, flat, and structurally sound before anything else happens. Remove any old flooring, then sweep or vacuum thoroughly.
- Over concrete, confirm the surface is properly dry and level, a damp-proof membrane may be needed, particularly in older UK properties.
- Over timber subfloors, make sure all boards are secured and any gaps addressed.
- Correct any dips or bumps exceeding 2mm within a 2 metre span using a suitable levelling compound.
Skipping proper subfloor preparation is one of the most common causes of imperfections showing through the finished floor, or tiles lifting later on. This step genuinely determines how the whole job turns out.
Step 2: Acclimate Your LVT
Leave the flooring in the room it's being installed in for at least 48 hours before starting, stacked flat and unopened so it can adjust to the room's actual temperature and humidity. Room temperature should sit between 18°C and 27°C before, during, and for 48 hours after installation. Skipping this step risks gapping or peaking later, and can void the product's warranty entirely.
Step 3: Plan Your Layout
Measure the room properly before laying a single tile. Starting from one wall without planning often leaves unsightly narrow slivers at the opposite edge.
- Mark a guideline through the centre of the room using a chalk line or laser level.
- Dry-lay a few rows first to check spacing and confirm edge tiles won't end up too narrow.
- Consider the room's main light source, laying tiles parallel to it often reads more visually cohesive.
- In open-plan spaces, think about how the layout flows from one area into the next.
Step 4: Install The Flooring
The method depends on whether your product is glue-down or click-lock, always follow the manufacturer's specific guidelines alongside the general approach below.
Glue-down installation:
- Apply adhesive evenly with a notched trowel, working in manageable sections.
- Let it reach its tacky phase, per the product's instructions.
- Lay each tile carefully, aligning to your layout guideline.
- Roll each tile firmly to remove air bubbles and ensure full contact.
- Clean any excess adhesive immediately with a damp cloth.
Click-lock installation:
- Start in one corner with the tongue facing the wall, using spacers to maintain the expansion gap.
- Insert the next tile's tongue into the groove at an angle, then lower and lock it into place.
- Work row by row, staggering joints for a natural look, often using the offcut from the previous row to start the next.
- Use a rubber mallet and fitting tool to seat joints tightly and seamlessly.
Step 5: Cut Tiles To Fit
Approaching the walls will need some tiles cut to size. Score and snap with a utility knife and straight edge for straight cuts, a heat gun can soften tiles for awkward shapes around pipes, and a jigsaw with fine blade control handles curves. Measure twice before cutting. Leave roughly a 5mm expansion gap around the room's perimeter for click-lock systems, later covered by skirting or beading.
Step 6: Final Touches
Inspect every joint once all tiles are down. For glue-down floors, roll the entire surface with a heavier roller (around 50kg) to ensure full bonding. For click-lock floors, remove the spacers and fit skirting or beading over the expansion gaps.
Avoid dragging furniture back in immediately, glue-down floors need roughly 24 to 48 hours for the adhesive to cure fully before bearing heavy items. Click-lock floors can generally take furniture back sooner, though it's still worth being gentle.
Maintaining Your New LVT Floor
Ongoing care is genuinely straightforward: doormats trap dirt and grit before it reaches the floor, regular sweeping or vacuuming handles daily dust, and a damp mop with a pH-neutral cleaner keeps it looking its best. Avoid harsh chemicals or wax-based products, which can damage the wear layer, and use felt pads under furniture to prevent scratching.
LVT Installation: Common Questions
How long does LVT need to acclimate before installation?
At least 48 hours in the room it's being fitted in, stacked flat and unopened, with room temperature held between 18°C and 27°C throughout and for 48 hours afterwards.
How much subfloor unevenness is acceptable before installing LVT?
Generally no more than 2mm of variation within any 2 metre span. Anything beyond that needs correcting with a levelling compound first.
Should I choose glue-down or click-lock LVT?
It depends on the space and your priorities. Glue-down offers a very solid, permanent result well suited to heavier-use areas, while click-lock installs faster and more easily, including over some existing floors.
How soon can furniture go back on a newly installed LVT floor?
For glue-down installations, wait roughly 24 to 48 hours for the adhesive to cure fully. Click-lock floors can generally take furniture sooner, though gentle handling is still worth it.
If you'd rather have this handled professionally, call us on 020 7036 0625 or request a free site visit for expert LVT installation.