Luxury Vinyl Tile (LVT) flooring is one of the most versatile and stylish choices for modern homes and commercial spaces in the UK. Offering the appearance of natural wood or stone with the practicality of vinyl, it’s no wonder that LVT has become a top pick among DIY enthusiasts, interior designers, tradesmen, and architects. We’ve put together a comprehensive step-by-step guide to help you install LVT flooring with confidence, precision, and ease.
Why Choose Luxury Vinyl Tile (LVT)?
Before we dive into the installation process, it’s important to understand why LVT is an excellent flooring solution. LVT combines high-end design with advanced technology to deliver a floor that is stunning, durable, and easy to maintain. It's suitable for both residential and light commercial projects, making it a favorite among UK homeowners and professionals alike.
LVT is also water-resistant, which makes it an ideal choice for kitchens, bathrooms, and utility rooms. Its multi-layered construction offers resilience under heavy footfall while maintaining a soft underfoot feel. With a vast range of colours, textures, and finishes to choose from, LVT allows you to achieve virtually any look—from classic oak planks to contemporary concrete effects.
Another major advantage is ease of installation. Whether you’re tackling a full home renovation or simply upgrading a single room, LVT can often be installed over existing flooring, saving time and money on subfloor preparation.
Now, let’s guide you through the installation process step-by-step.
Tools and Materials You'll Need
Before starting your LVT installation, make sure you have the following tools and materials:
- Luxury Vinyl Tiles (always buy an extra 10% for wastage)
- Adhesive (if using glue-down LVT)
- Utility knife
- Ruler or straight edge
- Measuring tape
- Rubber mallet
- LVT roller (for glue-down applications)
- Spacers (if click-lock installation)
- Chalk line or spirit level
- Subfloor levelling compound (if required)
Having the right tools on hand is half the battle. Always wear protective gloves and knee pads to keep yourself safe during the installation.
Step 1: Prepare the Subfloor
Begin by carefully inspecting your subfloor. It should be clean, dry, flat, and structurally sound. Remove any old flooring if necessary, and sweep or vacuum the area thoroughly.
If you're laying LVT over concrete, ensure the surface is dry and level. A damp-proof membrane may be required, especially in older UK properties. For timber subfloors, make sure all boards are secured and gaps are filled. Any dips or bumps over 2mm within 2 metres must be corrected using a suitable levelling compound.
Failing to properly prepare your subfloor can result in imperfections showing through or eventual lifting of the tiles. Take your time here—it truly sets the foundation for a successful LVT installation.
Step 2: Acclimate Your LVT Flooring
LVT flooring should be acclimated in the room where it will be installed for at least 48 hours before work begins. Stack the boxes flat, unopened, and allow them to adjust to the room’s temperature and humidity.
This step is essential to avoid future expansion or contraction of the tiles causing gapping or peaking. Room temperature should be maintained between 18°C and 27°C before, during, and for 48 hours after installation. Skipping this step can result in voided warranties and long-term issues.
Step 3: Plan Your Layout
Start by measuring the room to determine the best layout for the planks or tiles. Don’t just begin laying from one wall—this can lead to unsightly small pieces at the edges.
Using a chalk line or laser level, create a guideline through the centre of the room. Dry lay a few rows first to visualise the spacing and to ensure the tiles at the edges are not too narrow. Adjust your layout as needed to avoid thin slivers of tile near the walls.
Pay attention to the natural light source in the room—laying tiles parallel to the main light source often looks more visually appealing. For large open-plan spaces, consider how the tiles flow from one area to another for cohesive design.
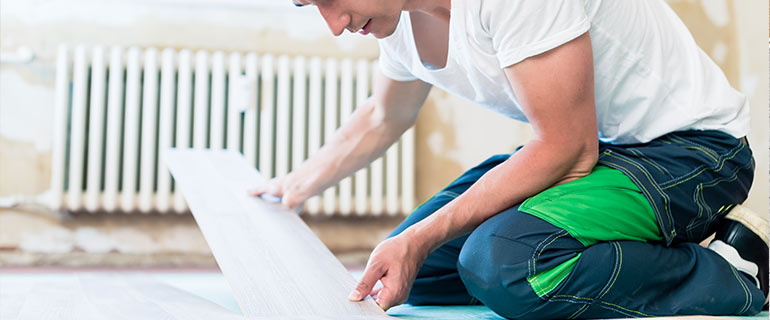
Step 4: Install the LVT Flooring
The method of installation can vary depending on whether your LVT is glue-down, click-lock, or loose lay. Make sure to follow the manufacturer’s guidelines provided with the product. Below, we’ll explain the two most common methods in the UK market: glue-down and click-lock.
Glue-Down Installation
- Apply adhesive evenly using a notched trowel, working in small sections.
- Wait for the adhesive to reach its tacky phase (follow the product’s instructions).
- Carefully lay each tile into place, aligning with your layout line.
- Use a roller to press each tile firmly into the adhesive and remove any air bubbles.
- Clean off any excess adhesive immediately with a damp cloth.
Click-Lock Installation
- Start in one corner with the tongue side facing the wall, using spacers between the wall and tile.
- Click the second tile into place by inserting the tongue into the groove at an angle, lowering it down and locking it tightly.
- Continue row by row, staggering the joints for a natural look—often using the off-cut from the last tile of the row to start the next row.
- Use a rubber mallet and fitting tool to ensure joints are tight and seamless.
Step 5: Cut Tiles to Fit
As you approach the walls, you’ll likely need to cut tiles to size. Use a utility knife and straight edge to score and snap the tiles. For awkward shapes or pipes, a heat gun can help soften the tile for shaping, or use a jigsaw with fine blade control for curved cuts.
Accuracy is key here—always measure twice and cut once. Leave a small expansion gap (approximately 5mm) around the edge of the room for click-lock systems, which can be covered with skirting or beading later.
Step 6: Final Touches
Once all tiles are laid, go back and inspect each joint. In glue-down installations, roll the entire floor with a 50kg roller to ensure full bonding. For click-lock floors, remove the spacers and install skirting boards or beading to cover expansion gaps.
Do not drag furniture back in immediately. Wait at least 24–48 hours after installation for the adhesive to cure before placing heavy items. For click-lock systems, you can usually move furniture back in right away, although it’s still best to be gentle.
Maintenance Tips for Your New LVT Floor
LVT is easy to maintain but benefits from regular care. Use doormats to trap dirt and grit, sweep or vacuum regularly, and mop using a damp mop with a pH-neutral cleaner.
Avoid harsh chemicals or wax-based cleaners that could damage the wear layer. Place protective pads on the bottom of furniture legs and refrain from dragging heavy objects across the floor to prevent scratches and dents.
With proper installation and maintenance, your LVT flooring from Flooring Centre will look pristine and stylish for years to come—all while withstanding the demands of modern living.
Ready to Transform Your Space?
We offer a wide selection of high-quality Luxury Vinyl Tiles to suit every taste and project. Whether you’re sprucing up your first flat, redesigning your client’s office space, or adding that final touch to a high-spec architectural build, our LVT ranges offer both beauty and performance. Our experts are on hand to advise professionals and first-time DIYers alike.