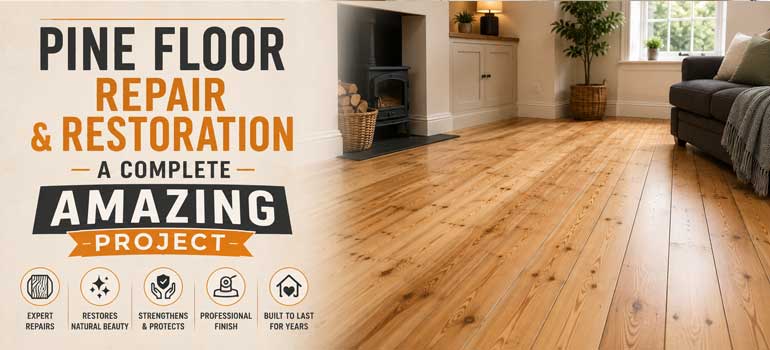
Pine flooring has long been a favourite among London homeowners, thanks to its rustic charm, affordability, and warm colouring. Whether you're in a Victorian terrace or a modern flat, pine floors add genuine character to a room. Over time, though, even sturdy floorboards show wear, warping, scratches, gaps, and general damage are among the most common issues we see. With the right approach, pine flooring can be beautifully restored, or even improved beyond how it originally looked.
Assessing The Damage And Planning The Restoration
Before starting, it's worth properly assessing what you're actually dealing with:
- Clear the room and give the floor a thorough vacuum and clean, which makes problem areas far easier to spot.
- Walk the floor barefoot, feeling for uneven or soft patches, these can indicate water damage or a hidden structural issue beneath the surface.
- List everything that needs attention: gaps to fill, damaged boards to replace, staining to sand out, or loose fixings to secure.
- If your property predates 1960, get the paint tested for lead before sanding. This is genuinely important and easy to overlook: many original pine floors in older London properties were painted at some point, and sanding lead-based paint releases hazardous dust. A simple test before work begins, and appropriate precautions if lead is present, protects everyone in the property.
Understanding What You're Actually Working With
It helps to know what's typically under your feet in a London period property. Scots pine and redwood are the standard floorboard timbers used in Victorian and Edwardian terraced houses, generally laid as 75mm to 125mm wide tongue-and-groove boards, around 19mm to 22mm thick. Older-growth Victorian pine specifically tends to be denser and tighter-grained than modern softwood, which is part of why original boards often respond particularly well to a full sand and refinish, sometimes producing a result that looks better than anything laid fresh over the top.
Replacing Damaged Pine Boards
Pine is a softwood, genuinely more vulnerable to dents and splits than hardwood species. Where boards are severely damaged through rot, warping, or infestation, replacement is the right call:
- Cut out the damaged board carefully with a circular saw, taking care not to damage the surrounding planks.
- Measure the space precisely and cut the replacement board to fit.
- Secure it with hidden nails or floorboard screws, keeping fixings out of sight.
- Match the grain direction to the surrounding boards for a genuinely seamless result.
If hiring a tradesperson for this specifically, make sure they have real experience with period properties, since spacing and board dimensions in original Victorian or Edwardian floors can vary from modern standard sizes.
Gap Filling And Squeak Repairs
Gaps between older pine boards are common, driven by London's older housing stock settling over time and fluctuating humidity causing boards to expand and contract. A few approaches to gap filling:
- Wood slivers: thin pine strips glued and sanded flush with the surface, long-lasting and visually consistent with the surrounding boards.
- Sawdust and resin mix: well suited to small or moderate gaps, blending sanding dust with filler resin for a naturally matched colour.
- Flexible filler: useful in properties with ongoing structural movement, though it can look slightly synthetic up close compared with the other two options.
For squeaks, locate the source and secure the board into the joist with a trim-head screw. A simple trick like talcum powder worked between creaky boards can help with minor cases, though persistent noise usually points to something in the subfloor worth investigating properly.
Sanding The Floor To Reveal Natural Beauty
This is the most transformative stage of the whole project. Removing the old finish, varnish, paint, or wax, refreshes the entire room:
- Start with a coarse grit, around 24 to 36, then progress to a fine grit of 100 or higher for a smooth final feel.
- Sand in the direction of the grain, since pine is soft enough that working against it risks gouging.
- Use an edging sander for corners and tight spots the main sander can't reach.
- Vacuum thoroughly between every stage, since leftover grit scratches the next pass rather than getting cleared away.
- Be cautious with thin or previously sanded boards, since oversanding shortens a floor's remaining lifespan. A board around 22mm thick can typically be sanded five or more times over its life, but that depends heavily on how much material previous sands have already removed.
Finishing Your Pine Floor: Wax, Oil, Or Varnish
| Finish | Appearance | Durability | Maintenance | Ideal For |
|---|---|---|---|---|
| Wax | Warm, low sheen | Low | Frequent reapplication | Low-traffic rooms |
| Hard-wax oil | Natural, matte look | Medium to high | Spot repairs possible | Living rooms, bedrooms |
| Varnish/lacquer | Semi-gloss or satin | Very high | Harder to spot-repair | Hallways, kitchens |
| Stain plus top coat | Fully customisable colour | Depends on top coat | Needs careful application | Design-led spaces |
For London homes, hard-wax oils (Osmo is a well-known option) tend to strike the best balance between a natural look and genuine resistance to daily traffic. Varnish and lacquer, from brands like Bona, Loba, or Junckers, suit busier hallways and kitchens better, where durability matters more than the softer, more repairable finish oil offers.
Styling Your Restored Pine Floor
Once restored, pine pairs naturally with modern design choices, matte black metal fixtures, Scandinavian-style furniture, or bolder palettes in greens, charcoals, and navy. Area rugs add warmth and reduce wear in high-traffic zones. A well-restored pine floor is generally viewed favourably in the London property market, signalling character and quality, though it's one positive factor among several rather than a guaranteed boost to a sale price on its own.
Pine Floor Restoration: Common Questions
Do I need to test for lead paint before sanding an old pine floor?
If your property predates 1960, yes, this is genuinely important. Sanding lead-based paint releases hazardous dust, so testing beforehand and taking appropriate precautions if it's present protects everyone in the property.
What's the standard floorboard timber in London's period properties?
Scots pine and redwood, typically laid as 75mm to 125mm wide tongue-and-groove boards around 19mm to 22mm thick, the standard for Victorian and Edwardian terraced housing.
How many times can a pine floor realistically be sanded?
A board around 22mm thick can typically be sanded five or more times over its life, though this depends heavily on how much material previous sanding has already removed.
Is hard-wax oil or varnish the better finish for a pine floor?
It depends on the room. Hard-wax oil suits lower-traffic spaces like bedrooms and living rooms well, while varnish or lacquer holds up better in busier areas like hallways and kitchens.
Call us on 020 7036 0625 or request a free site visit if the scale of restoration is more than you'd like to take on yourself, we offer free consultations and stand behind our work.